
Recently, we played with watercolours and plastic wrap in the Tuesday morning class. This is a fun technique that creates interesting textures and effects. If you’d like to give this a try – here are the steps.
1. Select the watercolor paper of your choice (I use 140# or 250# coldpress) and secure it to a flat, waterproof surface. Make sure the paper is stretched or secured tightly to prevent buckling when it gets wet.
2. If you want to place your colours in specific locations such as flower blossoms, pencil in those spots now as a guideline for placement of your colour.
3. Select the colours you want for your painting and prep them on a palette. Make sure you prepare enough. You’ll be surprised now much you need. Have your brushes, water container, paper towels and plastic wrap nearby for easy access. You need to work quickly on Steps 4 and 5.
4. Begin by wetting the whole paper. Then apply your paints to the paper, following your guidelines or dropping colour randomly. Let your colours touch and overlap unless you want white space. The colour may fade up to 40% so go more vibrant than you want your finished piece to be. This will be the foundation for your main subject.
5. While the wash is still wet, lay a sheet of plastic wrap gently over the painted area. It’s best to use a slightly larger piece of plastic wrap than the area you want to cover.
6. Start manipulating the plastic wrap by crinkling, folding, or scrunching it up. Experiment with different patterns and textures by gently pressing the plastic wrap onto the wet paint. Think about what shapes you’d like to work with. (Round for florals, vertical for trees, etc) You can use your fingers or a soft brush to shape the plastic wrap.
7. Allow the painting to completely dry with the plastic wrap still in place. This can take several hours or even overnight, depending on the thickness of the paint and the humidity in your environment. It’s essential to let it dry thoroughly to avoid any smudging or unwanted effects.
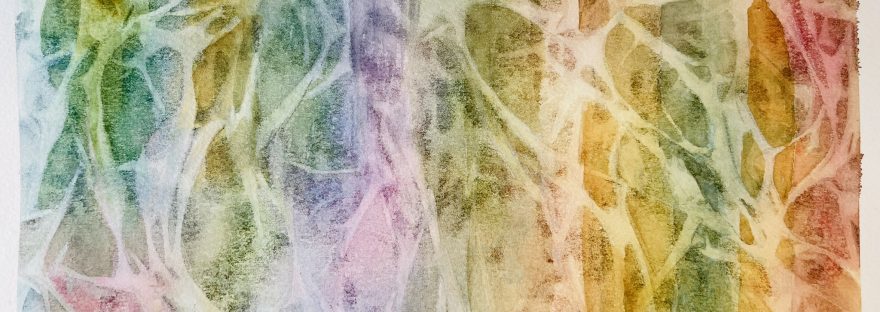
8. Once the paint is dry, carefully peel off the plastic wrap from the paper. Be gentle to prevent any damage to the painted surface. You’ll notice that the areas covered by the plastic wrap will have unique textures and patterns, creating an interesting effect in your painting.
9. You can now add details to your painting. The textured areas created by the plastic wrap often suggest shapes and can serve as inspiration for your next steps.
In the painting below I used this technique to create the restless water.
